This mode makes the PV installation and the battery cover the most of the loads' demand, reducing energy import from the grid. Users can set different battery charging/discharging time windows based on electricity prices at different times to reduce the electricity cost.
Choose Energy management > Energy management mode.
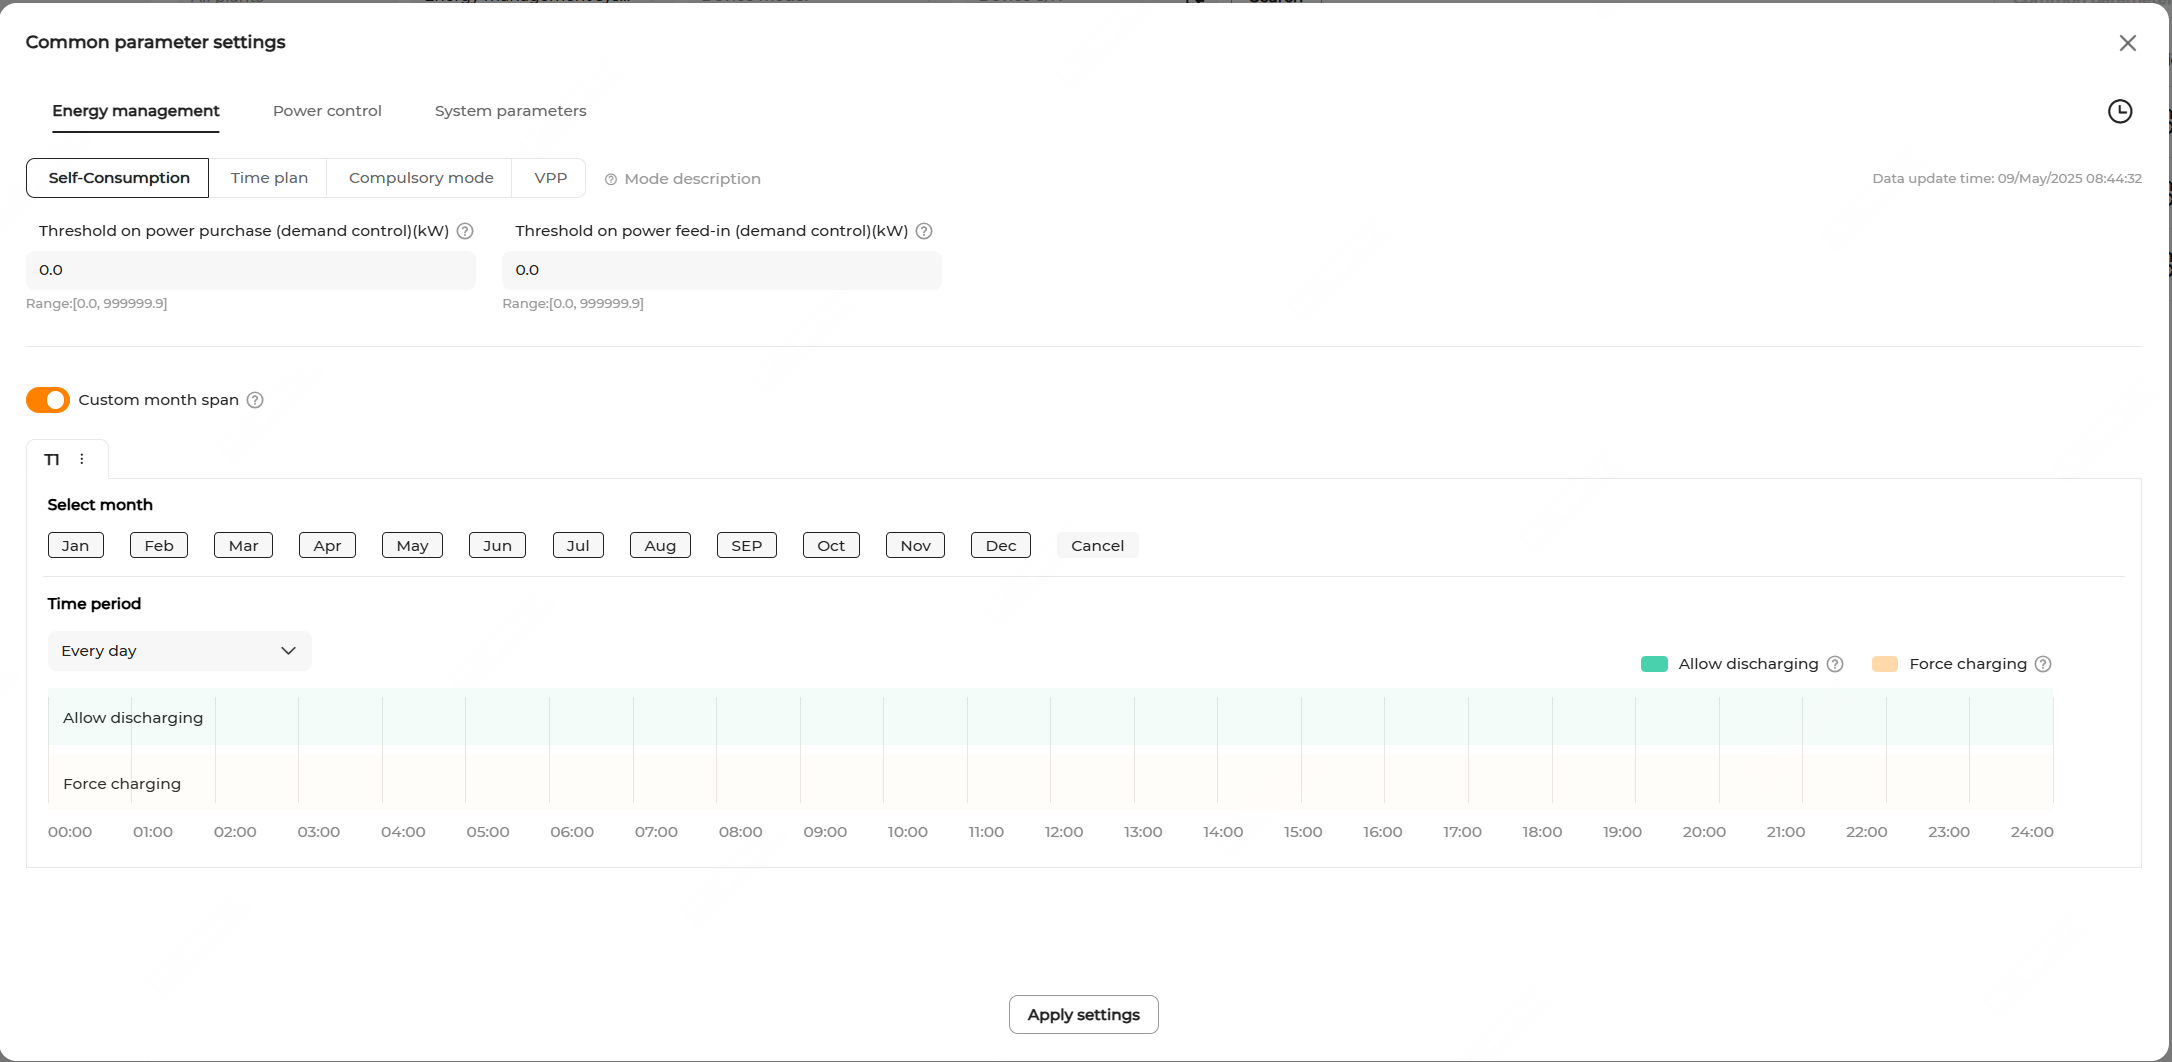
Select the Self-consumption mode.
Enable or disable Peak shaving mode. It is disabled by default.
If Peak shaving mode is enabled, you must set the Reserved
SOC for peak shaving (%) within the range of 0–100. Default
value: 70.
Note: The Reserved SOC for peak shaving
must meet the following constraints. Otherwise, the setting will not take
effect.
Reserved SOC for peak shaving (%)≥Power backup lower SOC
threshold(%)+2%;
Reserved SOC for peak shaving (%)must not exceed the SOC
upper limit.
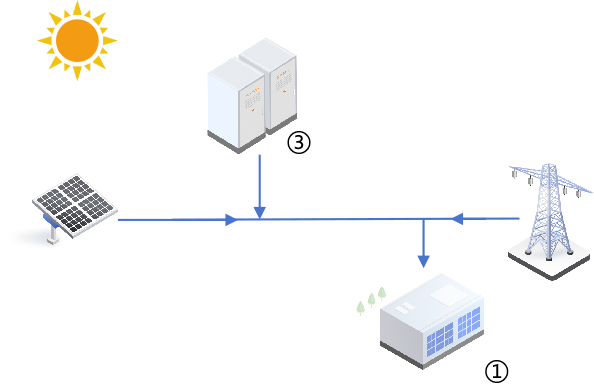
Set a power upper limit for the system to purchase energy from the grid in Threshold on power purchase (demand control) (kW). Default value: 0. When the energy purchase power exceeds this threshold, the excess power will be drawn from the battery, helping reduce the user's electricity cost.
The power supply priority for the loads is: PV > grid (within threshold) > battery.
Note: This threshold does not apply during forced charging time periods. In this case, the limit is determined by the Power limit for energy purchase set in Grid-connected power control. If Purchase energy with limited power is not enabled, there will be no restriction on battery charging.
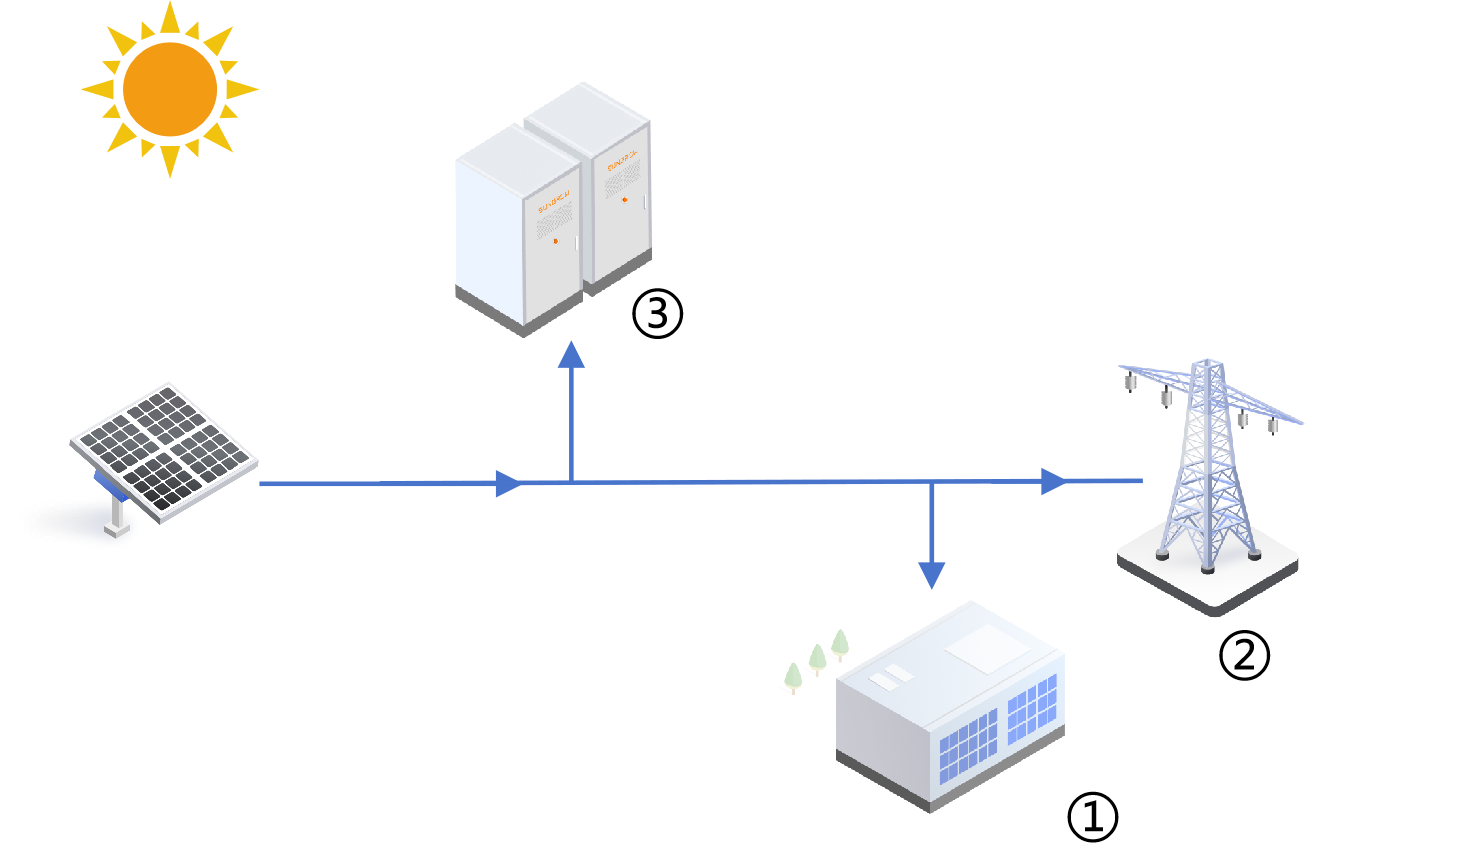
Set a power upper limit for the system to feed energy into the grid in Threshold on power feed-in (demand control) (kW). Default value: 0. After you configure this threshold, the system prioritizes load demand, and the surplus PV power is fed into the grid. Only when the feed-in power exceeds this threshold, the excess power will be absorbed by charging the battery.
The consumption priority of PV power is: Load > grid (within threshold) > battery.
Enable Custom time period to add a battery usage plan. Users can create custom charging/discharging time windows, allowing the system to make the most of the PV output in on-peak hours and charge the battery properly in off-peak hours. In this way, electricity cost is reduced.
Select months in the Select month section.
You can set different time windows based on seasonal energy demand patterns.
In the Time period section, select the days on which the battery charging/discharging plan applies.
You can apply the charging/discharging plan to every day, or set different charging/discharging plans respectively for working days & non-working days. The plan applies to every day by default.
Every day: The default option, indicating the set charging/discharging plan applies on all days.
Working days & non-working days: Set different charging/discharging plans for weekdays and weekends.
Set the battery discharging and forced charging windows within a day.
Tap a time period in the Allow discharging time bar. Then, drag the left or right edge of the window to adjust the length of time. A new discharging window will be created (with the minimum granularity of 15 minutes). The battery is allowed to discharge to supply the loads in the specified time period.
Tap a time period in the Force charging time bar. Then, drag the left or right boundary of the window to adjust the length of time. A new charging window will be created (1 hour by default). Click the added time window, and in the pop-up dialog box, enter the target charging SOC in Target SOC.
In the specified time period, the battery is charged at its maximum allowable power until reaching the preset target SOC.
Note:
Battery discharging and forced charging windows can overlap. If a time window allows both battery discharging and forced charging, forced charging will be executed first.
Outside of the configured time periods, the battery is not allowed to discharge or be charged by drawing power from the grid. In this case, the battery can only be charged by PV power.
Click Apply settings. In the pop-up window, enter the Task name, set the Instruction valid period, and click Confirm.
 Note: This threshold does not apply during forced charging time periods. In this case, the limit is determined by the Power limit for energy purchase set in Grid-connected power control. If Purchase energy with limited power is not enabled, there will be no restriction on battery charging.