Layout Setup for Residential PV Plant
- On the European server, the setup is done by importing the Excel layout file. See Layout Setup for C&I PV Plant for details.
- On other servers, the setup is by importing the physical layout template picture. The procedure is explained below in this chapter.
Note: The physical layout template is included in the scope of delivery of optimizers/RSDs. For usage instructions, refer to the guidance on the template.
-
Click Import layout file, choose
 to upload the picture of the physical layout template for the plant, and click Start recognition. The import progress of the layout file will be displayed on the page.
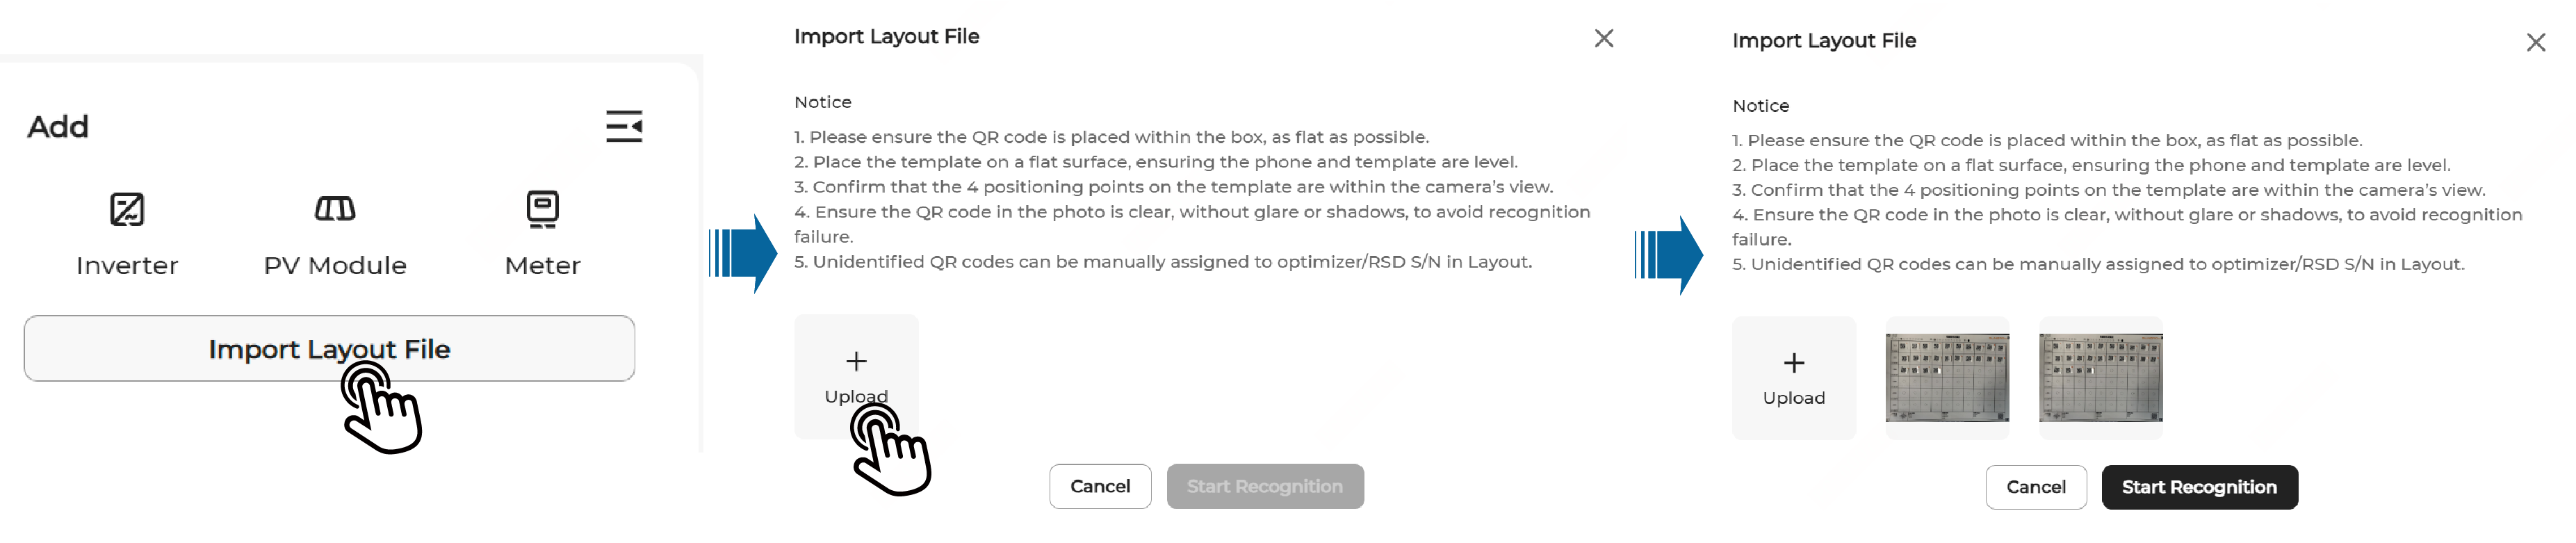 Notice:
-
Do not take photos of the physical layout template under strong light. Otherwise, the QR code may not be recognized due to the reflection of light.
-
Turn off the live photo function on the phone when taking photos and upload a still photo. Otherwise, the QR code may not be recognized successfully.
-
Check the recognition result carefully. If the QR code cannot be recognized due to damage or folding, manually add the optimizer/RSD by its S/N.
-
-
View the import results and handle exceptions.
After the import is complete, the system returns the Layout import successful message and redirects to the layout page, where you can view the imported layout.
Handle exceptions, if any, according to the prompts on the page.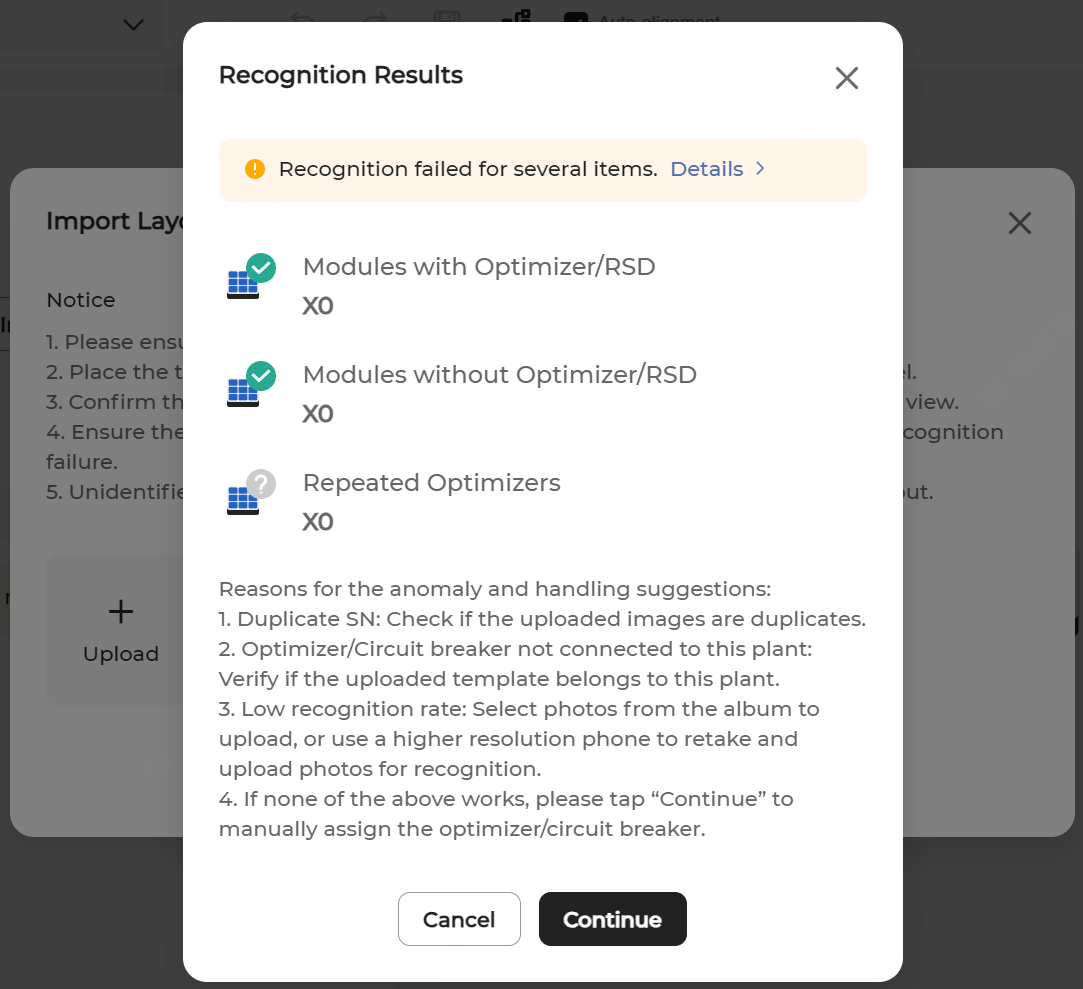
-
After completing the layout setup, click
 in the upper right corner of the page to publish the layout.
Note: If you do not want to publish the layout immediately, you can click
in the upper right corner of the page to publish the layout.
Note: If you do not want to publish the layout immediately, you can click to save the current layout settings.
 -
If a plant is geographically scattered, add the layouts for the other areas of the plant.
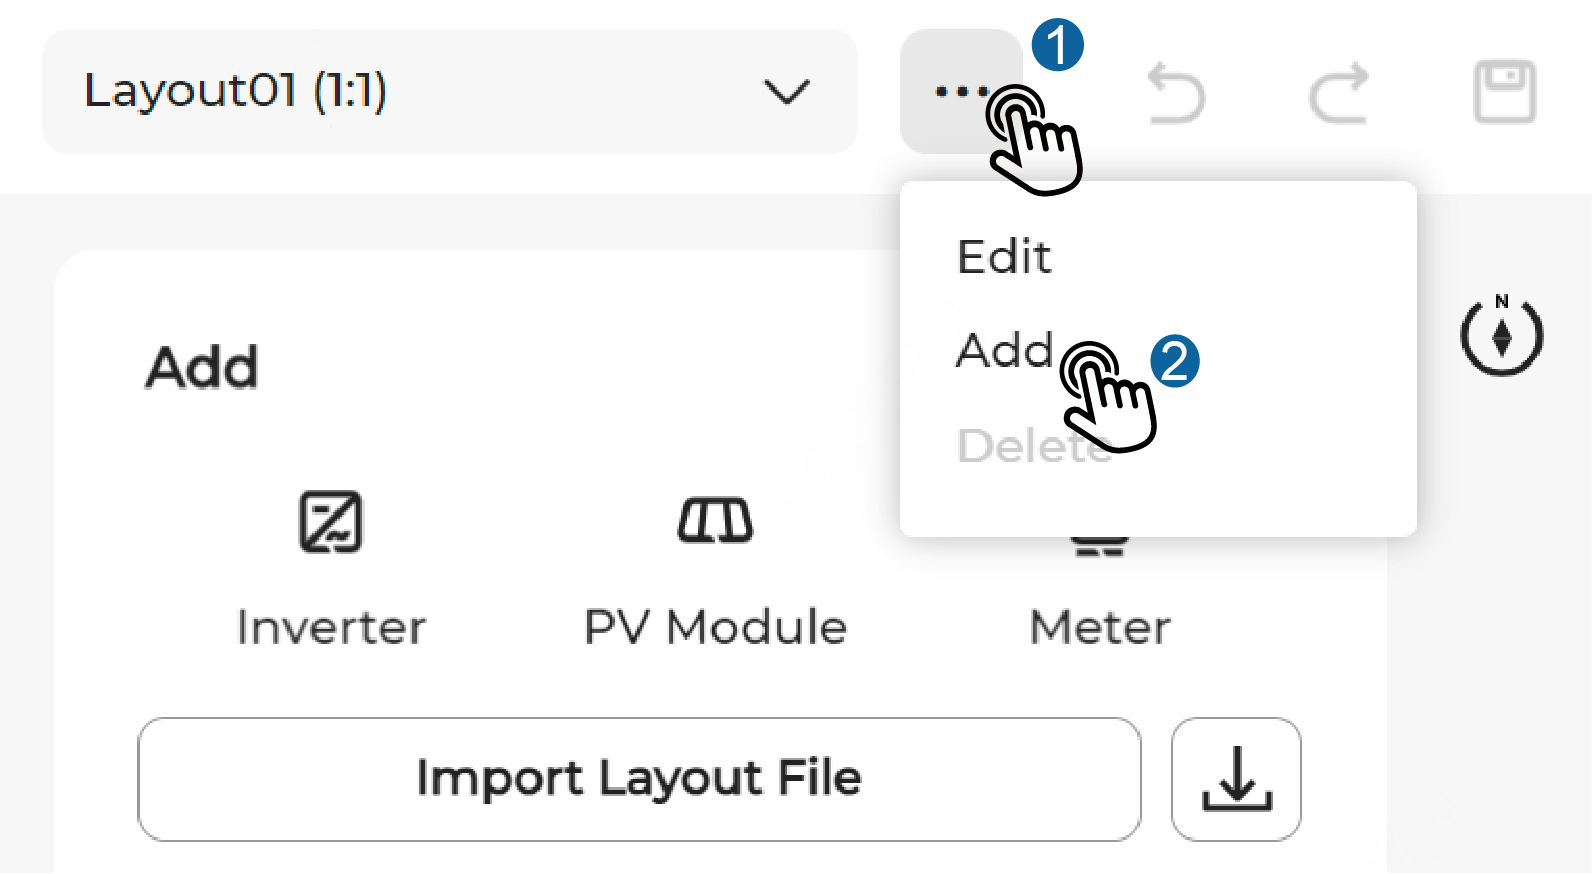
Click
 > Add at the top of the page to define the physical layout name and Optimizer/RSD-module ratio, and then click Confirm.