Configure Time-of-Use Power Templates
-
When you enable time-of-use power for the first time, a time-of-use power template must be created to define the charging and discharging schedule for different time periods. The system supports two time granularities: 30-minute interval, and 1-second interval. The following sections provide detailed setup instructions for each.
Note: The first created time-of-use power template is designated as the default template, which can be modified but not deleted.-
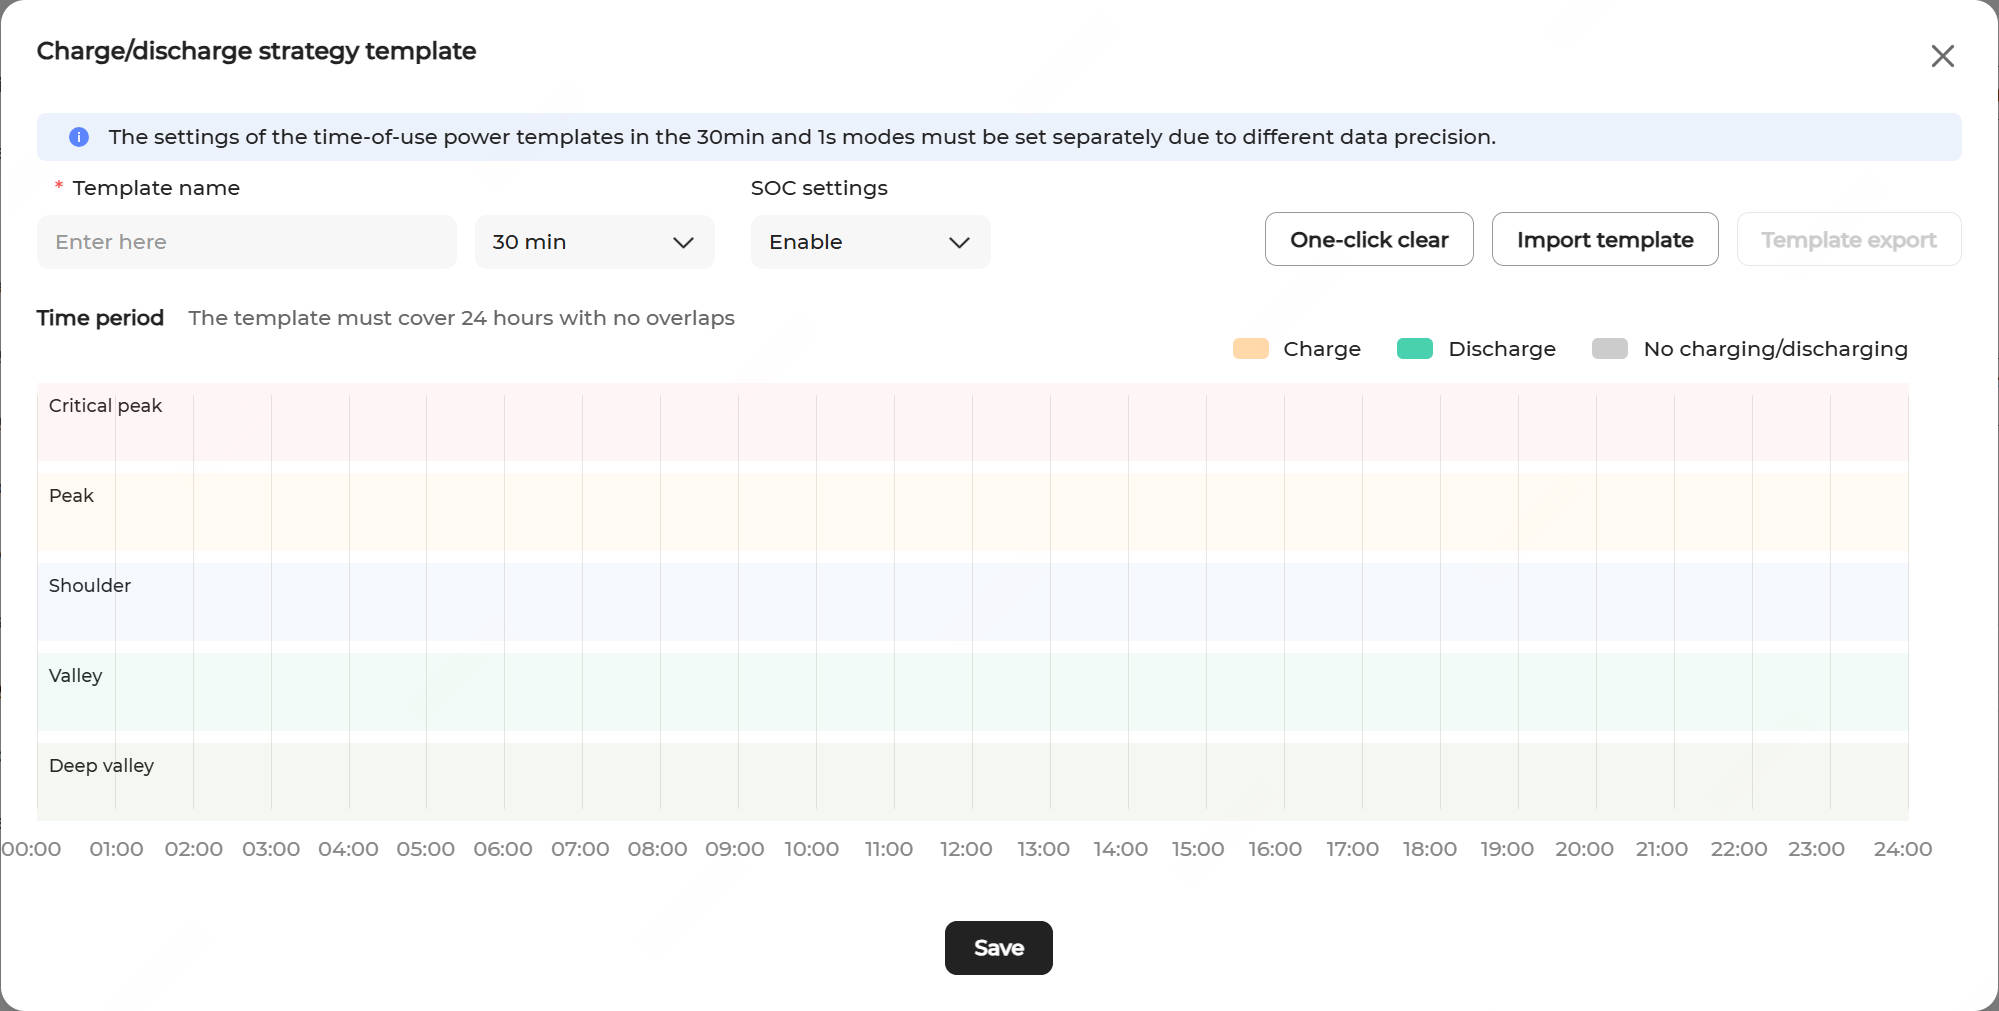
30-Minute Interval Configuration:Note: The following steps demonstrate how to manually configure the charging and discharging schedule for a day. Alternatively, an existing template can be imported using the Import template button.
- Enter a custom Template name.
- Select 30 min as the time unit.
- Configure SOC settings.
- Enable: To configure the ESS charging/discharging settings for a time period, you must set the SOC target value (%). The ESS automatically stops the current operation when the SOC reaches the specified target value.
- Disable (default): The ESS continues to operate at the configured charging/discharging power throughout the time period.
- Click the Critical peak, Peak, Shoulder, Valley, and Deep valley sections respectively to select time blocks. Drag the handles on the two sides of the selected block to adjust its duration.
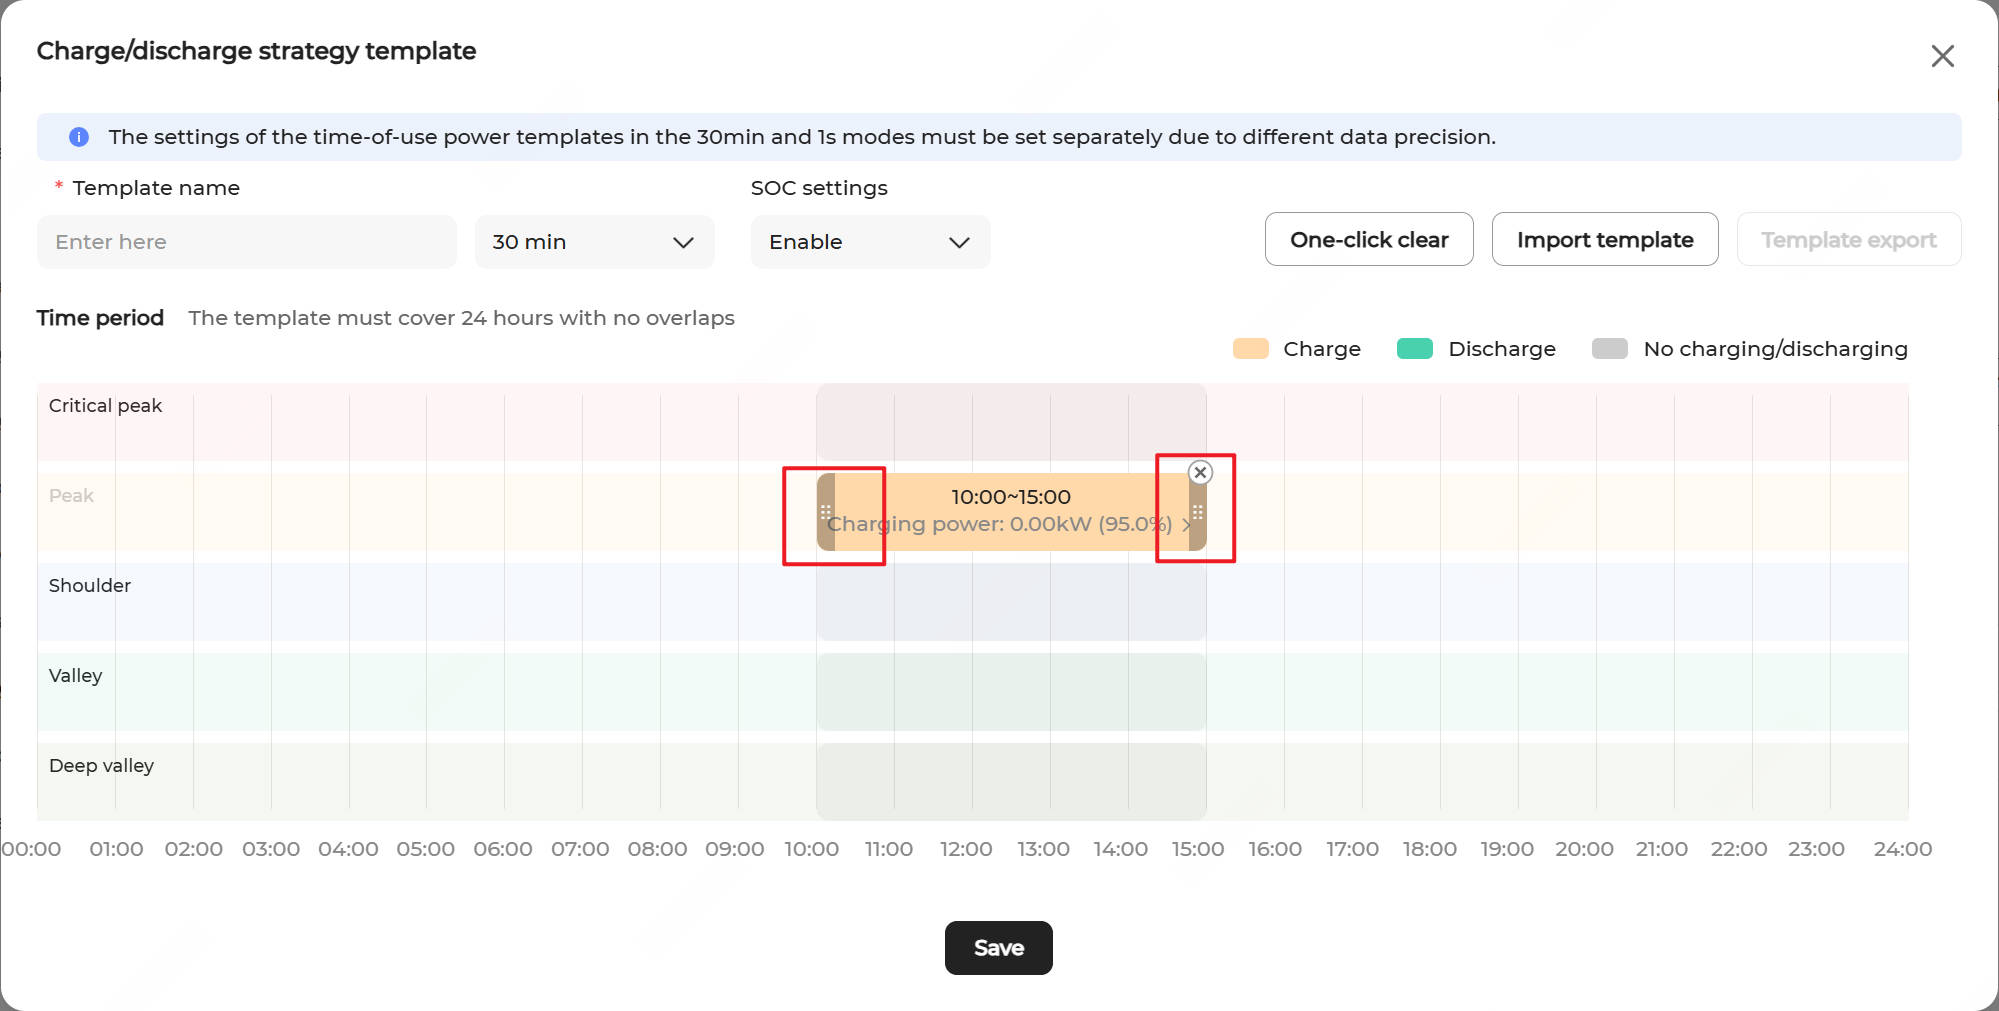
To delete a selected time period, click the Close icon in the upper right corner of the selected block.
- Click a time block to configure charging and discharging parameters. Click Confirm to apply the settings.
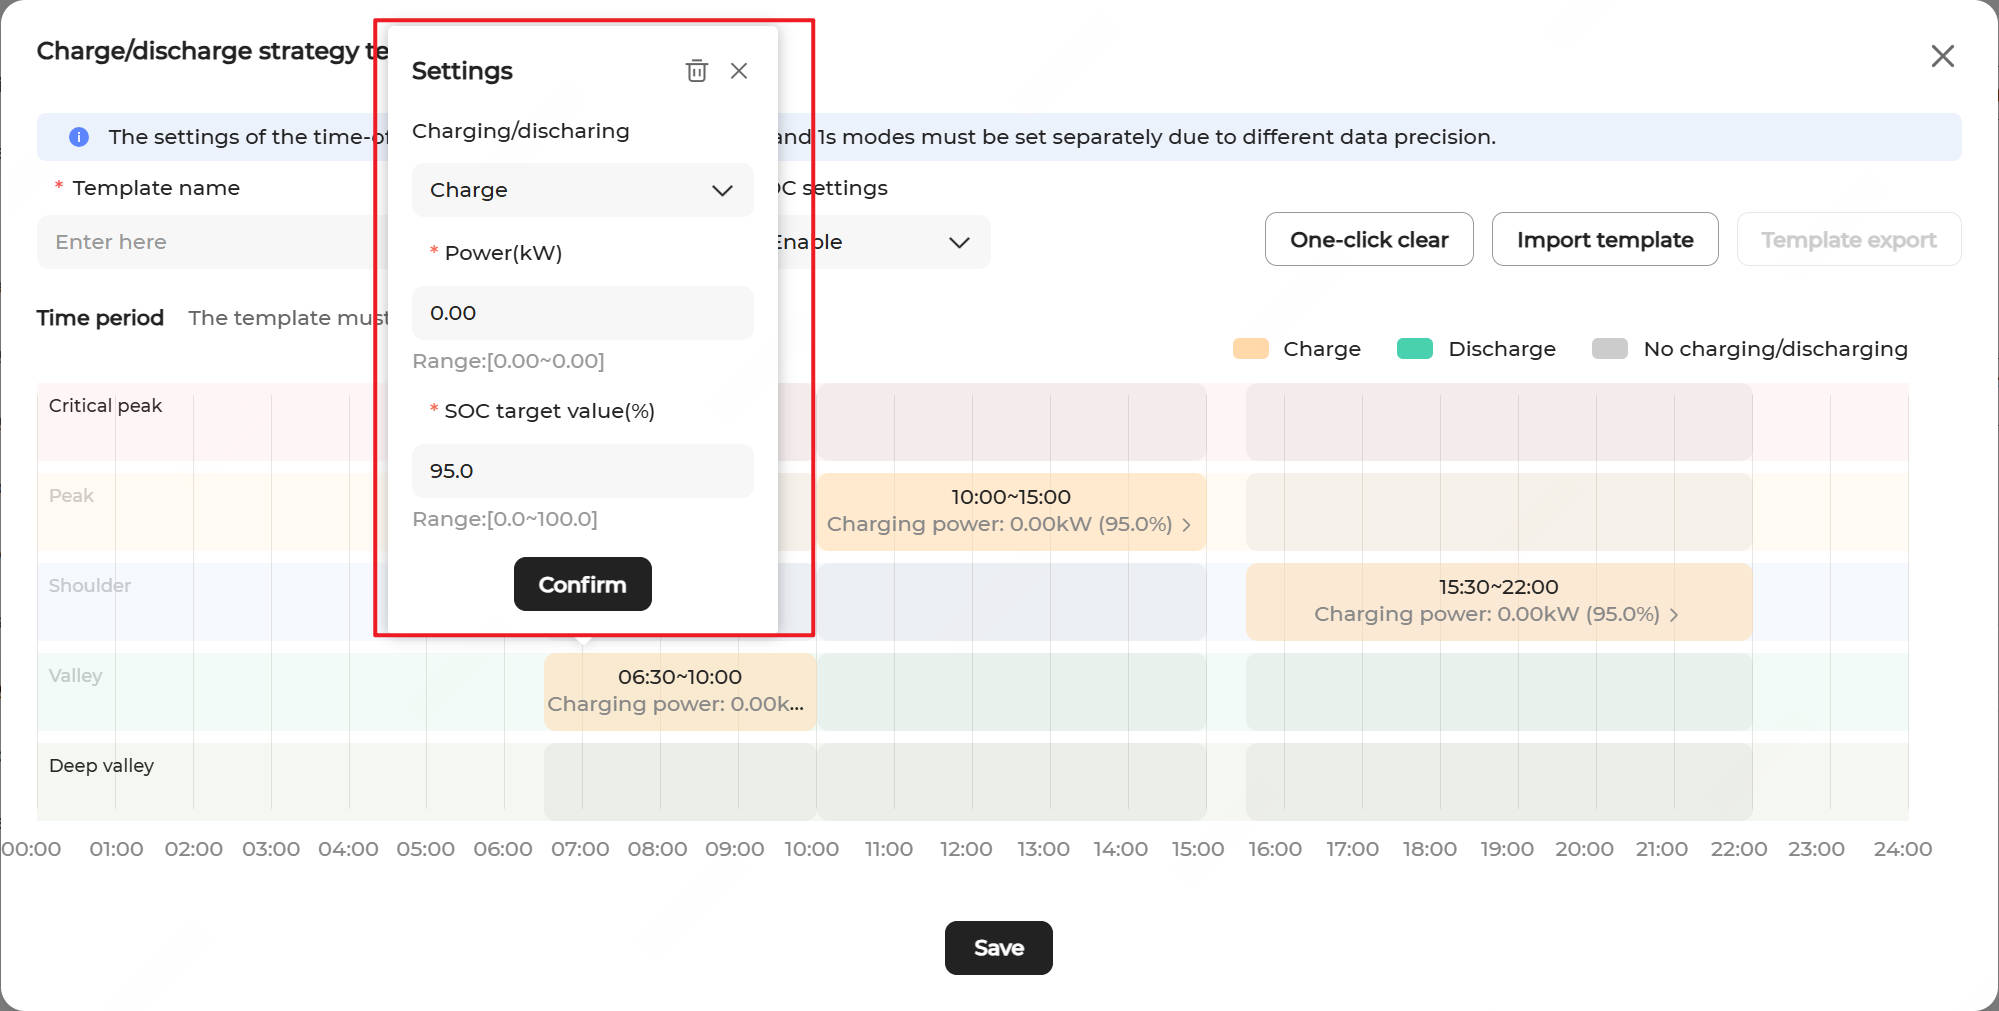
Charging/discharging: Select Charge, Discharge, or No charging/discharging.
Power(kW): Set the charging and discharging power based on actual needs.
SOC target value (%): When SOC settings are enabled, this parameter must be configured for both charging and discharging time periods. The default value is 95 for charging periods and 5 for discharging periods. The valid range is [0, 100].
- Click One-click clear in the upper right corner to delete all configured time periods.
- Repeat steps d to e until the entire 24-hour period is defined without overlaps.
- Click Save to save the settings.
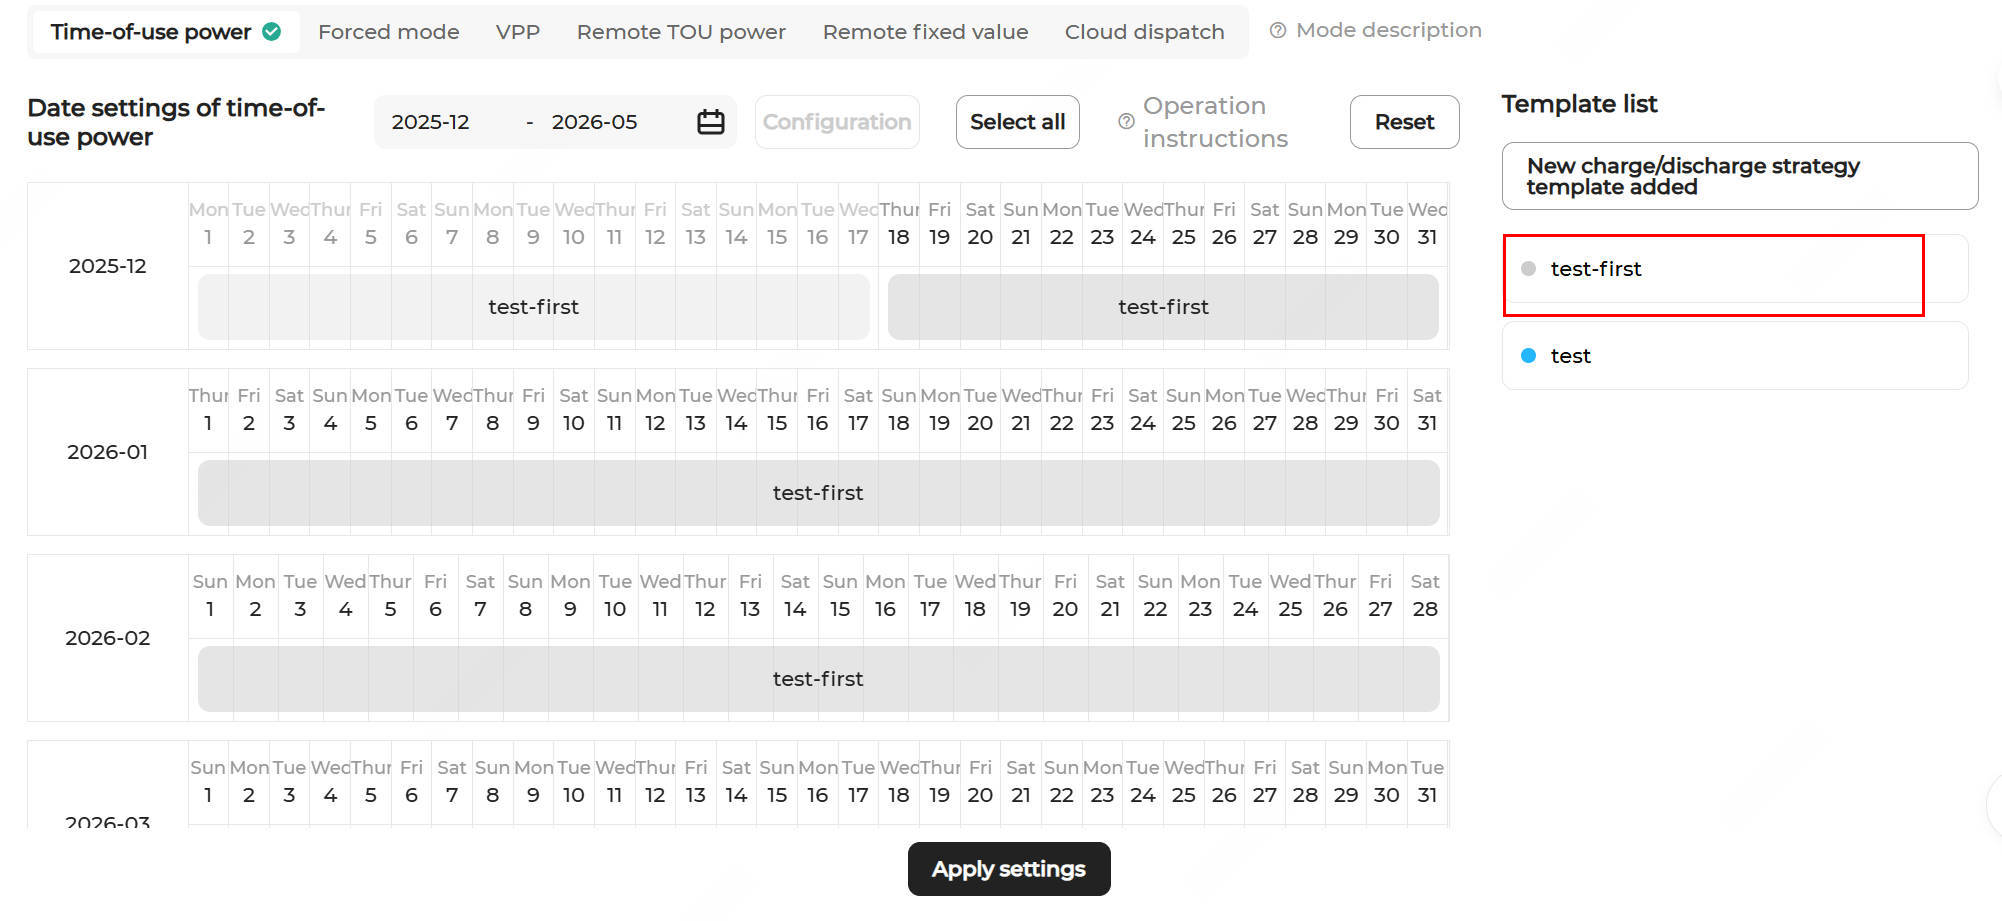
- The created template will appear in the Template list on the right panel.
-
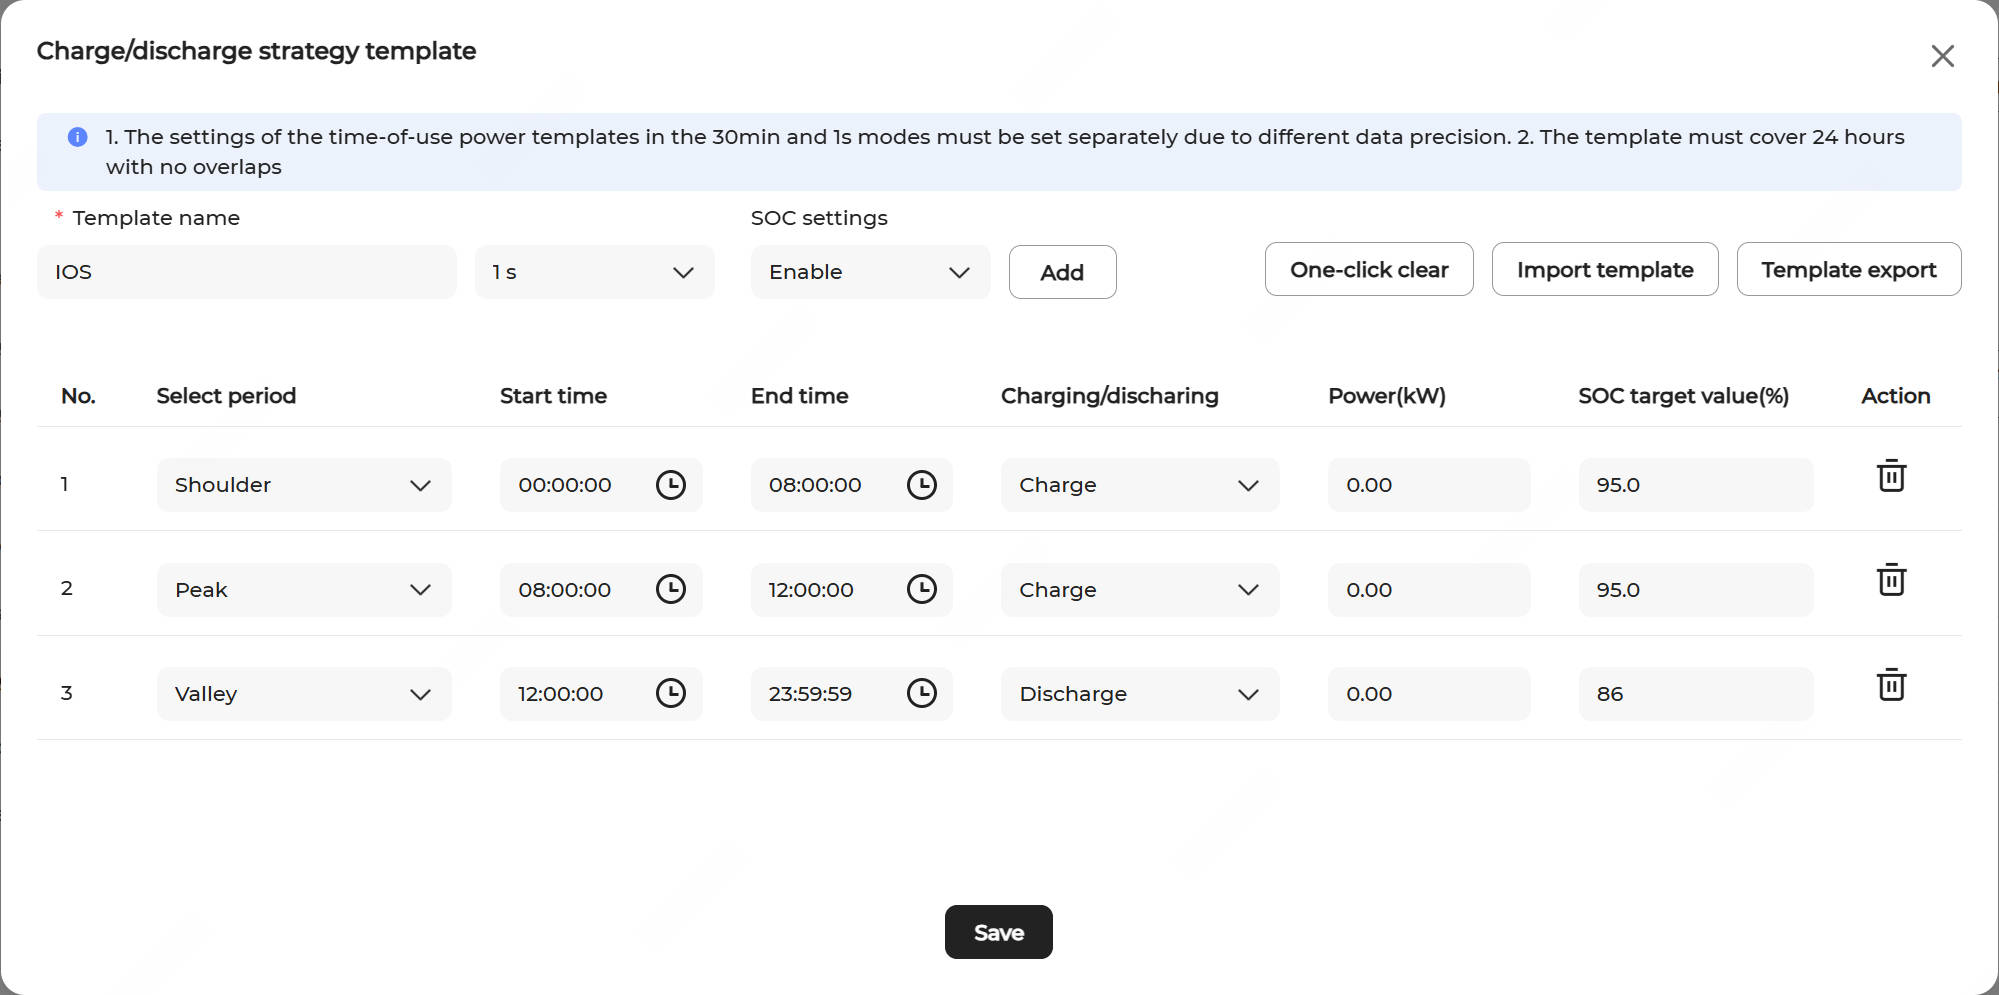
1-Second Precision Configuration:Note: The following steps demonstrate how to manually configure the charging and discharging schedule for a day. Alternatively, an existing template can be imported using the Import template button.
- Enter a custom Template name.
- Select 1 s as the time unit.
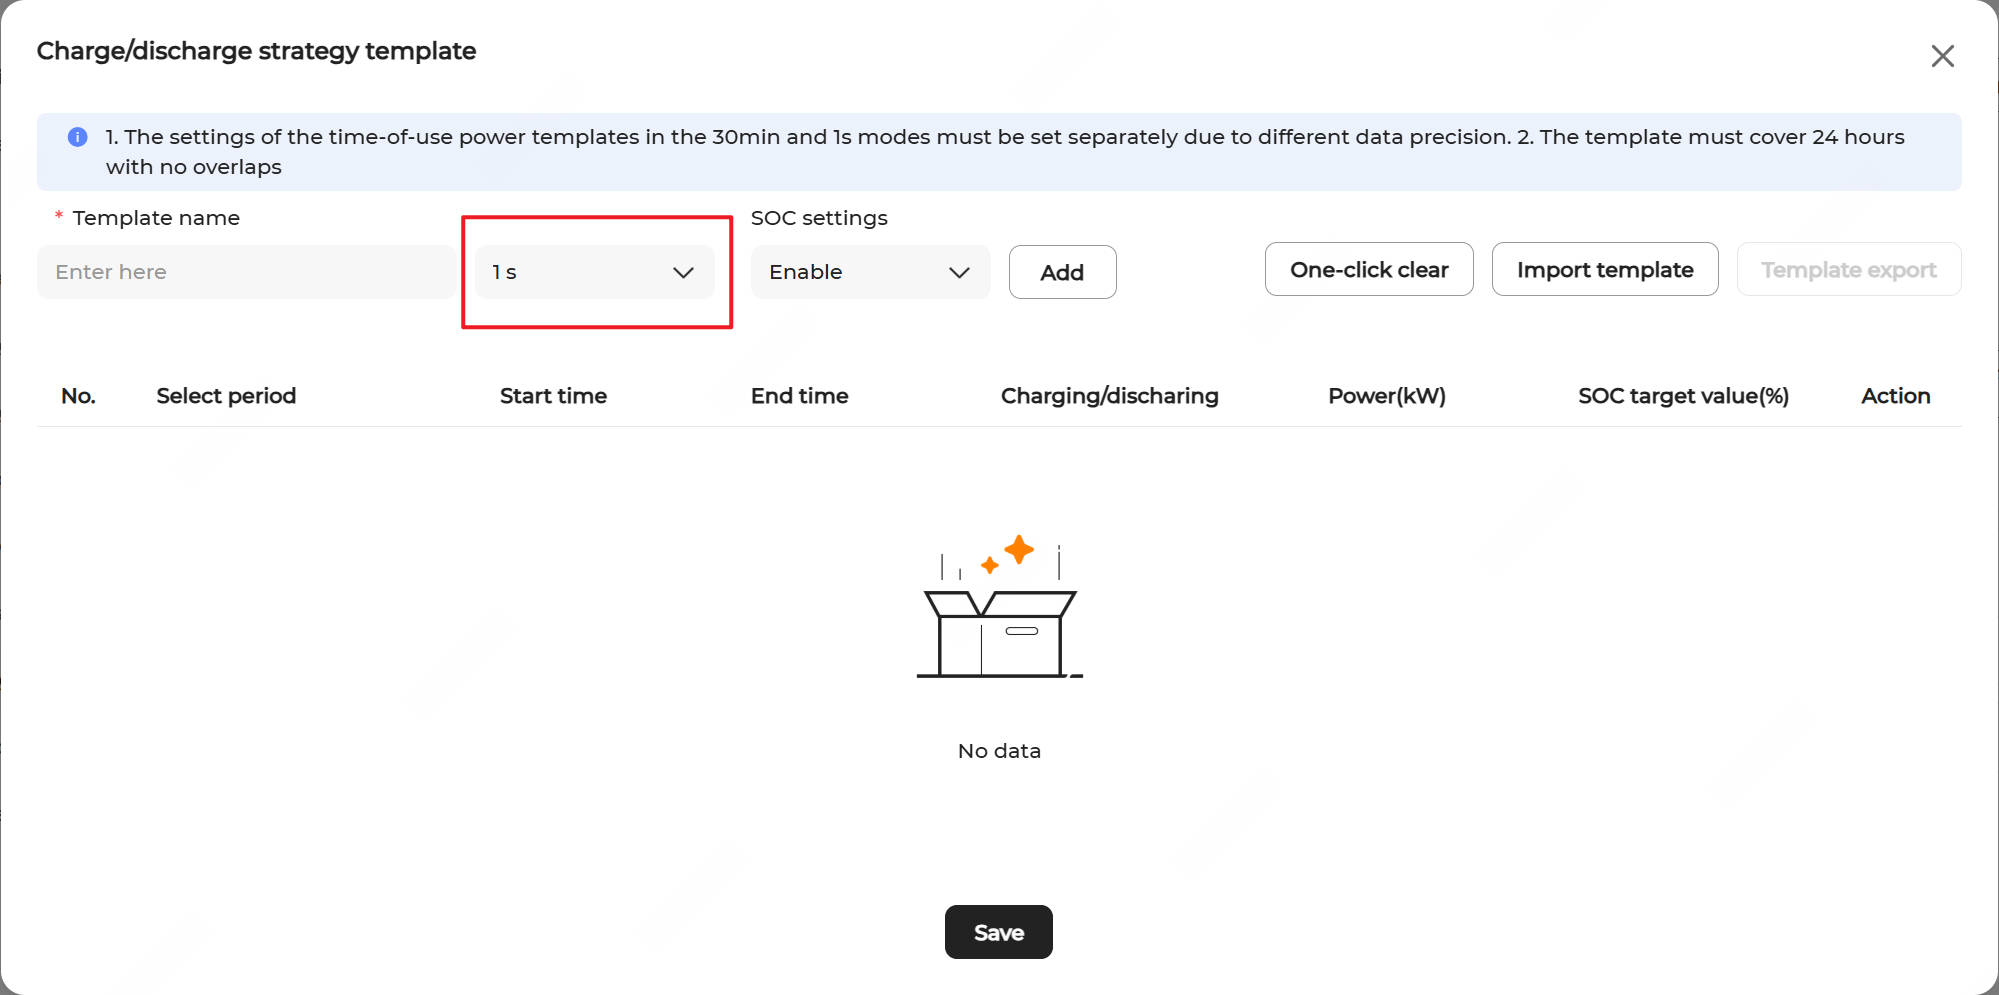
- Configure SOC settings.
- Enable: To configure the ESS charging/discharging settings for a time period, you must set the SOC target value (%). The ESS automatically stops the current operation when the SOC reaches the specified target value.
- Disable (default): The ESS continues to operate at the configured charging/discharging power throughout the time period.
- Click Add and configure the following parameters:
Parameter
Description
Select period Click
 to choose from Critical peak, Peak, Shoulder, Valley, and Deep valley.
Start time Set the start time (in HH:MM:SS format).
End time Set the end time (in HH:MM:SS format).
Charging/discharging Select a status for the period from Charge, Discharge, or No charging/discharging.
Power (kW) Enter a fixed power value, up to the rated power.
SOC target value (%) When SOC settings are enabled, this parameter must be configured for both charging and discharging time periods. The default value is 95 for charging periods and 5 for discharging periods. The valid range is [0, 100]. - Repeat step d until the entire 24-hour period is defined without overlaps.
- Click Save to save the settings.
- The created template will appear in the Template list on the right panel.
-
30-Minute Interval Configuration:
-
(Optional) Add a charge/discharge strategy template. If the existing templates do not meet requirements, a new template can be added.
- Click Add charge/discharge strategy template above the template list.
- Configure the template following step 2.
- The created template will appear in the Template list on the right panel.Note: Up to 10 charge/discharge strategy templates are supported.
- Click Add charge/discharge strategy template above the template list.
-
(Optional) Modify a charge/discharge strategy template. Click the Edit icon
 of the desired template to edit it.
-
(Optional) Export a template. Click the Edit icon of the desired template and click Template export in the upper right corner to export the template to local system.
-
(Optional) Delete a charge/discharge strategy template. Click the Delete icon
 of the desired template to delete it.